Why VS Code?
The most important tool for developers is that which lets us author code: the development environment.
IDEs vs. Text Editors
First, let’s establish some context. For developers of many languages, standard practice dictates the use of an IDE (Integrated Development Environment). IDEs are generally heavyweight, fully-featured code editors that include things like build/compiler setup, debuggers, code analysis tools, and more. Examples of IDEs include Eclipse, Visual Studio, and XCode.
By contrast, web developers have traditionally utilized text editors, which are very lightweight by comparison and have historically not shipped with many features. There exist IDEs for web dev (the most popular of which is probably WebStorm by JetBrains), but text editors such as Notepad++, Vim, Emacs, Sublime Text, and VS Code are still dominant.
Why VS Code?


What makes VS Code special? Microsoft’s Visual Studio Code is a text editor with powerful IDE-like features. Side note: VS Code is a totally separate product from Visual Studio the IDE.
In terms of what is available right now, it seems like VS Code is a “best of both worlds” option between IDEs and Text Editors. Here are some more reasons why we’re using VS Code:
- VS Code is simple to download and install on any OS.
- It is completely free.
- It is non-opinionated and open source, with non-proprietary standards.
- You can bring your favorite keybindings from Sublime, Vim, etc. with you.
- It’s easy to customize and has many useful extensions.
- It has powerful IDE-like features including a built-in debugger and terminal.
Getting Started
For the purposes of this post, we’re going to assume the reader is using Mac/OSX for development, and thus the keyboard shortcuts will be OSX. If you’re following along on Windows or Linux, fear not; many of the commands are the same if you substitute the command key (⌘) for the control key, but here are the key binding reference docs just in case.
- If you haven’t already, download VS Code and install it by dragging it into the Applications folder.
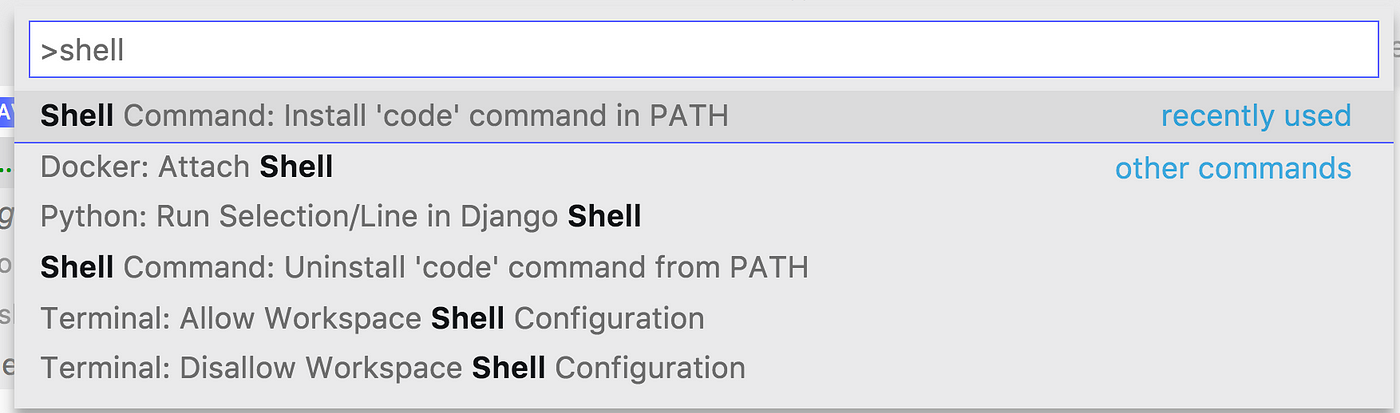
- Open VS Code, and type
command(⌘) + shift + p. - Start typing the word “shell”.
- Select
Install 'code' command in PATH. This will enable you to open VS Code from any terminal window by typingcode. You can also pass an argument, such as the current folder (.), to open it with VS Code:code .

Core Features
IntelliSense
Simply put, VS Code is excellent at code completion. By default, it will read special comments called document strings to guide you about function arguments and variable types on the fly. For JavaScript, VS Code utilizes the JS Doc standard out of the box.
VS Code will also look into imported software modules (such as node_modules when developing in Node.js) and give you information about function argument types and descriptions. It also remembers what types variables are and guides you through available methods, etc.
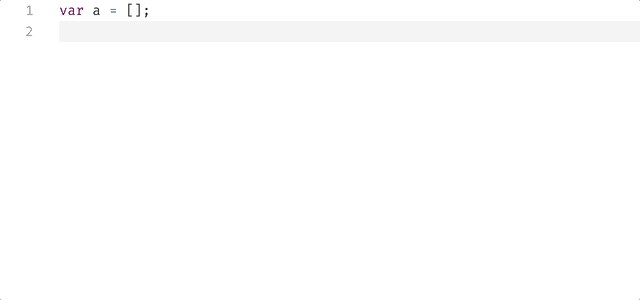
As an example, open up a new JavaScript file (make sure you’ve saved it as .js). Type the following: var a = []. On a new line, type a., then watch what VS Code prompts you with:

For more information on IntelliSense including how to customize it, click here.
Emmet and Snippets
VS Code has Emmet abbreviations built in.
Emmet uses CSS-selector syntax to generate chunks of HTML in any .html file. Emmet abbreviations also work in any stylesheet (.css file). It will tab-complete and automatically place the cursor in any additional attribute values that need to be added, which you can tab through.


Check out the Emmet section of our curriculum here or the emmet cheat-sheet here for reference. Also check out VS Code’s Emmet docs.
You can also look into creating your own VS Code snippets. The syntax is very similar to other editor’s snippets, like Sublime. Or you could always download other people’s snippets!
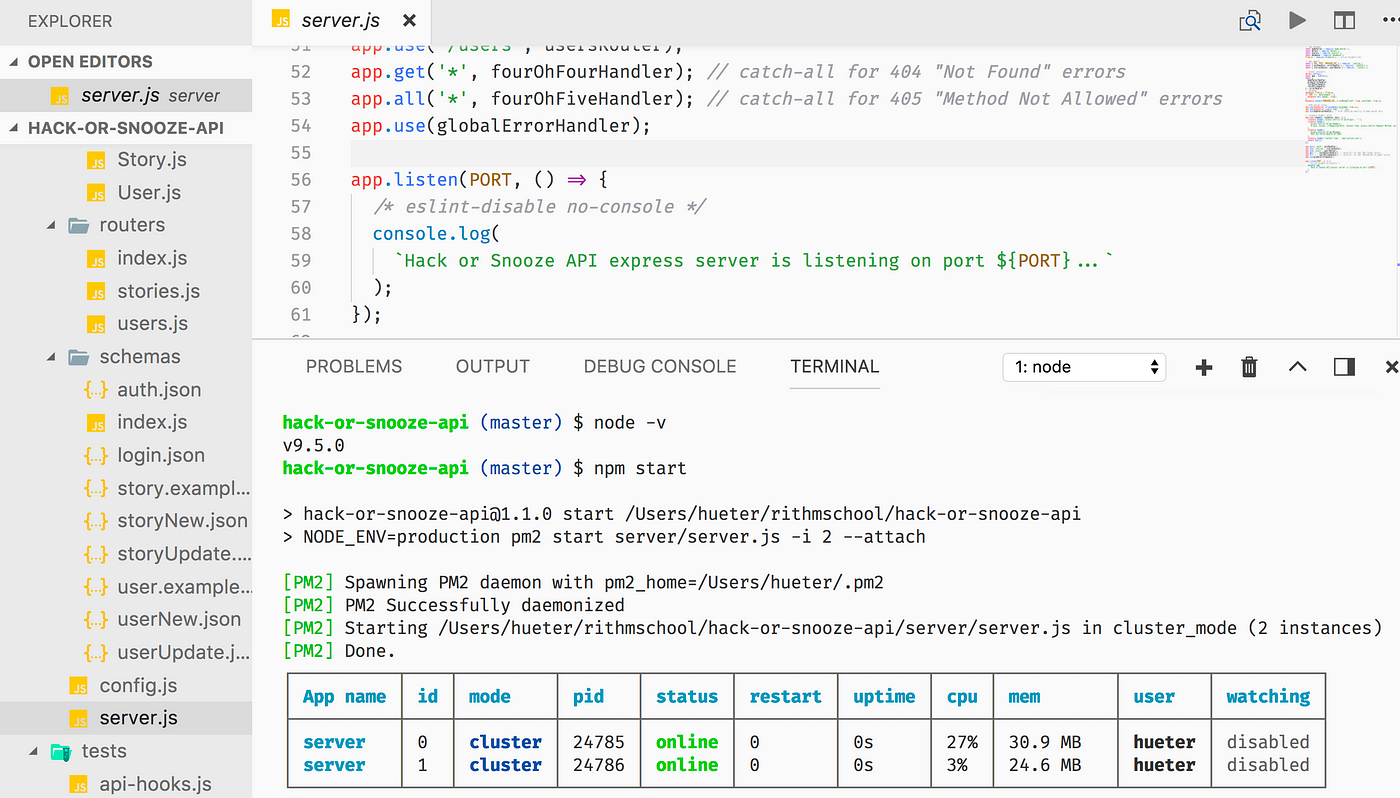
Terminal
VS Code has a built-in terminal which, by default, is exactly the same as whatever your default terminal is (e.g. zsh, bash, etc.). The normal node and python commands, etc. work normally, and things like Virtual Environments will also apply. You can have multiple nested terminal sessions open as well.
You can open the VS Code terminal with control(^) + backtick(`), or simply click on the bottom left of the screen.

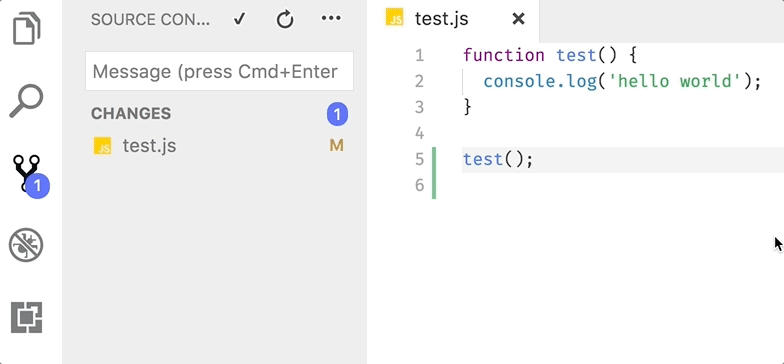
Git Integration
VS Code also automatically tracks source control changes for any project that is a valid git repository. Modified files will show up with an M next to them, while untracked (new) files will get a U. The colors will change depending on the git status.
You can even stage, commit, and push from the source control view (control(^) + shift + g):

Additionally, visual git merge conflict resolution is now built-in, so managing merge conflicts has never been easier. Files with conflicts will show up with a C next to them.
Debugger
The built-in VS Code Debugger for Node.js is very powerful, and it can be expanded with the popular Chrome Debugger extension. However, this requires a server to be running and is outside the scope of this blog post (perhaps in the future we can have a blog post about Debugging in VS Code 😉).
That said, if you are still interested, check out articles for debugging Node here and for React here. And here is the full reference for Node debugging.
Command Palette & Code Navigation
Command Palette
Menu => View => Command Palette…
Shortcut: command(⌘) + shift + p
In VS Code, there is single bar at the top which lets you enter editor commands by keyword, such as settings. You can then select from the list that will appear, e.g. Preferences: Open User Settings.
Using the command palette is the fastest way to configure VS Code and manage workspace (project) settings.
However, take note of the > at the beginning of the bar. Changing this character makes the bar behave differently, enabling fast "Go To Commands", listed below.
Go To File
Menu => Go => Go To File…
Shortcut: command(⌘) + p
No character at the beginning of the bar lets you quickly search and go to files. The files are sorted by recently opened.


Go To Line
Menu => Go => Go To Line…
Shortcut: control(^) + g
: at the beginning of the bar lets you jump to a specific line in the current file.


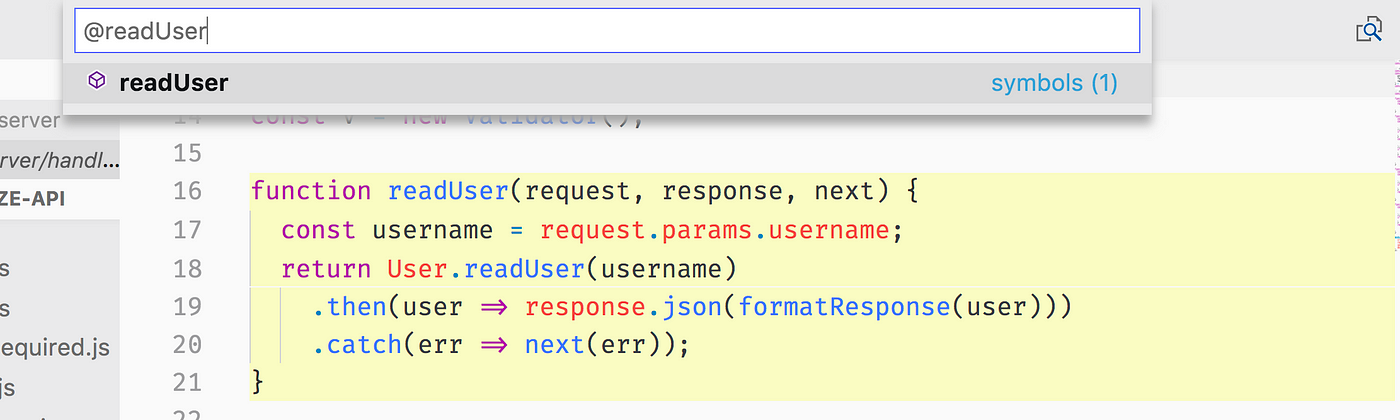
Go To Symbol in File
Menu => Go => Go To Symbol in File…
Shortcut: command(⌘) + shift + o
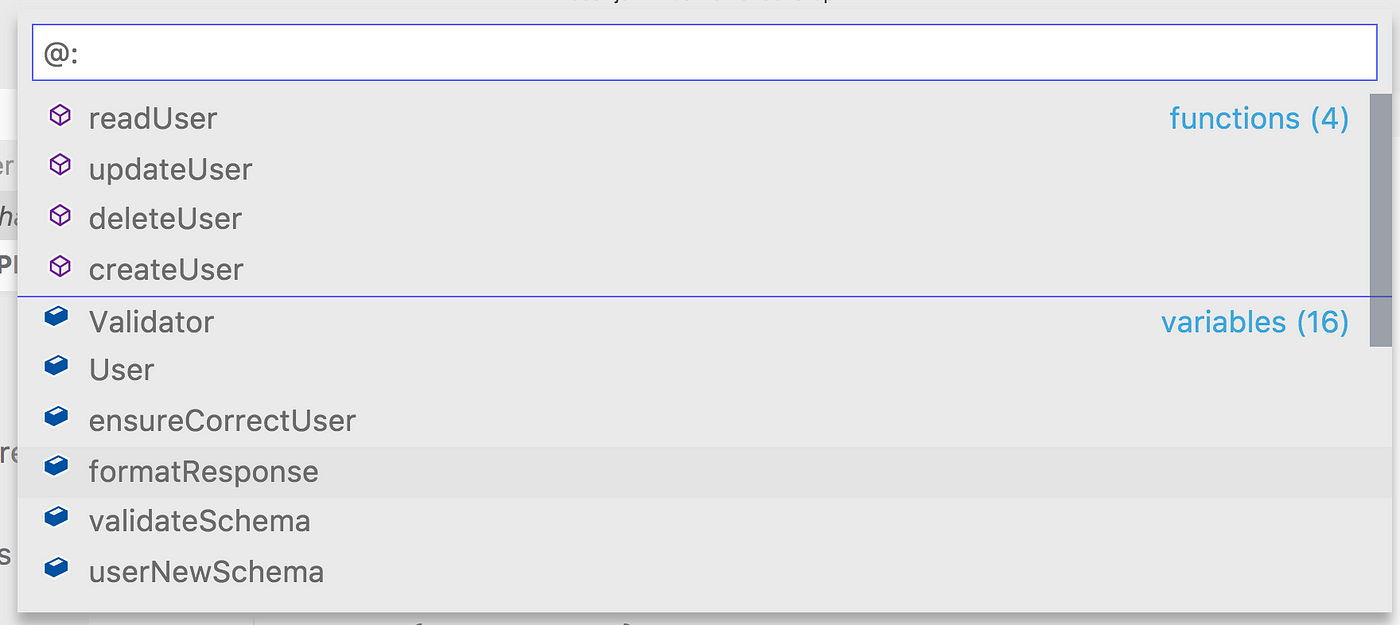
@ at the beginning of the bar is a symbol search in the current file. Examples of symbols are variables, functions, classes, React components, etc.

Adding : after the @ will group symbols by category, e.g. @: will show all the variables grouped together separated by functions and classes, etc.

Go To Symbol in Workspace
Menu => Go => Go To Symbol in Workspace…
Shortcut: command(⌘) + t
# at the beginning of the bar is an extremely powerful tool - search for symbols across the entire project. This can give you insights regarding all the files that a specific function is used, for example, like a more precise global search.

The above gif shows searching for the User class, which is a model that gets imported in many places.
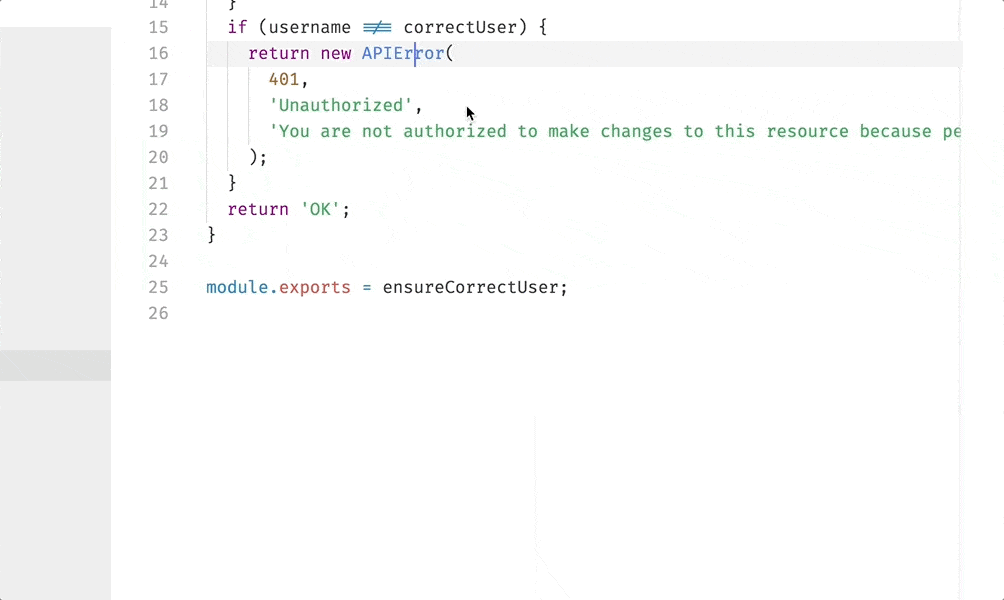
Go To Definition
Menu => Go => Go To Definition
Shortcut: command(⌘) + click
A fantastic feature of VS Code is the ability to look up where functions or classes are originally declared/defined. You can do this simply by holding down the command key and clicking on a function invocation just as you would click a hyperlink.
Note that depending on the project configuration and extensions you have installed, you may have to click where the import or require statements are in the file. But when it works, it saves you a lot of time.

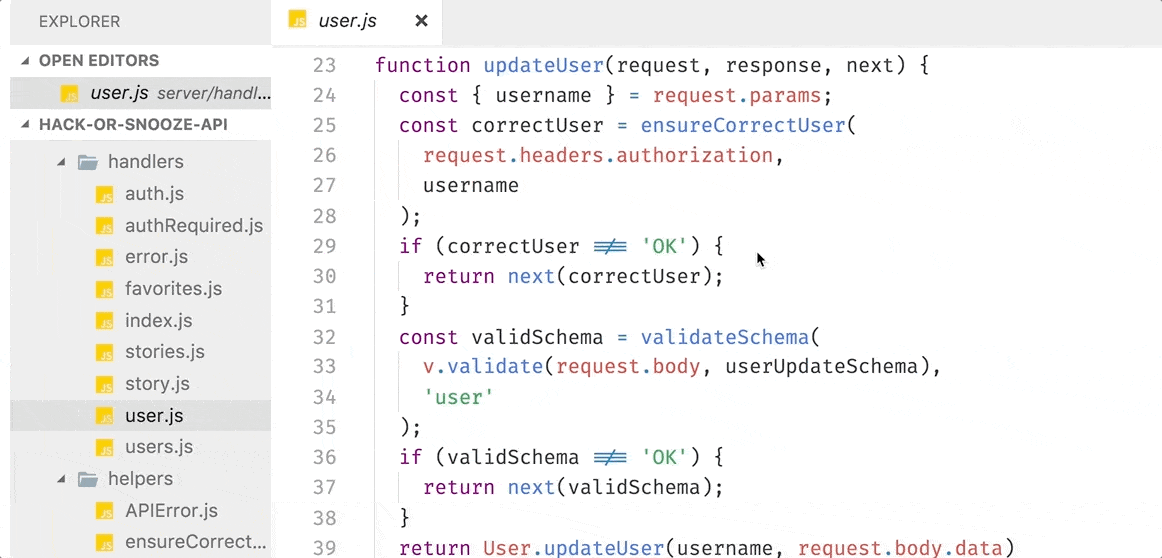
In the above gif, the original file open is server/handlers/user.js and clicking on the ensureCorrectUser function invocation takes us to where it was declared: server/helpers/ensureCorrectUser.js.
You can also “Go To Definition” by right clicking on the code.
Find & Replace
VS Code has standard text editor find and replace with special options for case sensitivity, whole word match, and regular expressions.
Tip: You can quickly reuse a previous search term by using option(⌥) + down arrow(↓) and option(⌥) + up arrow(↑)to navigate through your search term history.
Find in Current File
Menu => Edit => Find
Shortcut: command(⌘) + f
Replace in Current File
Menu => Edit => Replace
Shortcut: command(⌘) + option(⌥) + f
Global Find Across all Files
Menu => Edit => Find in Files
Shortcut: command(⌘) + shift + f

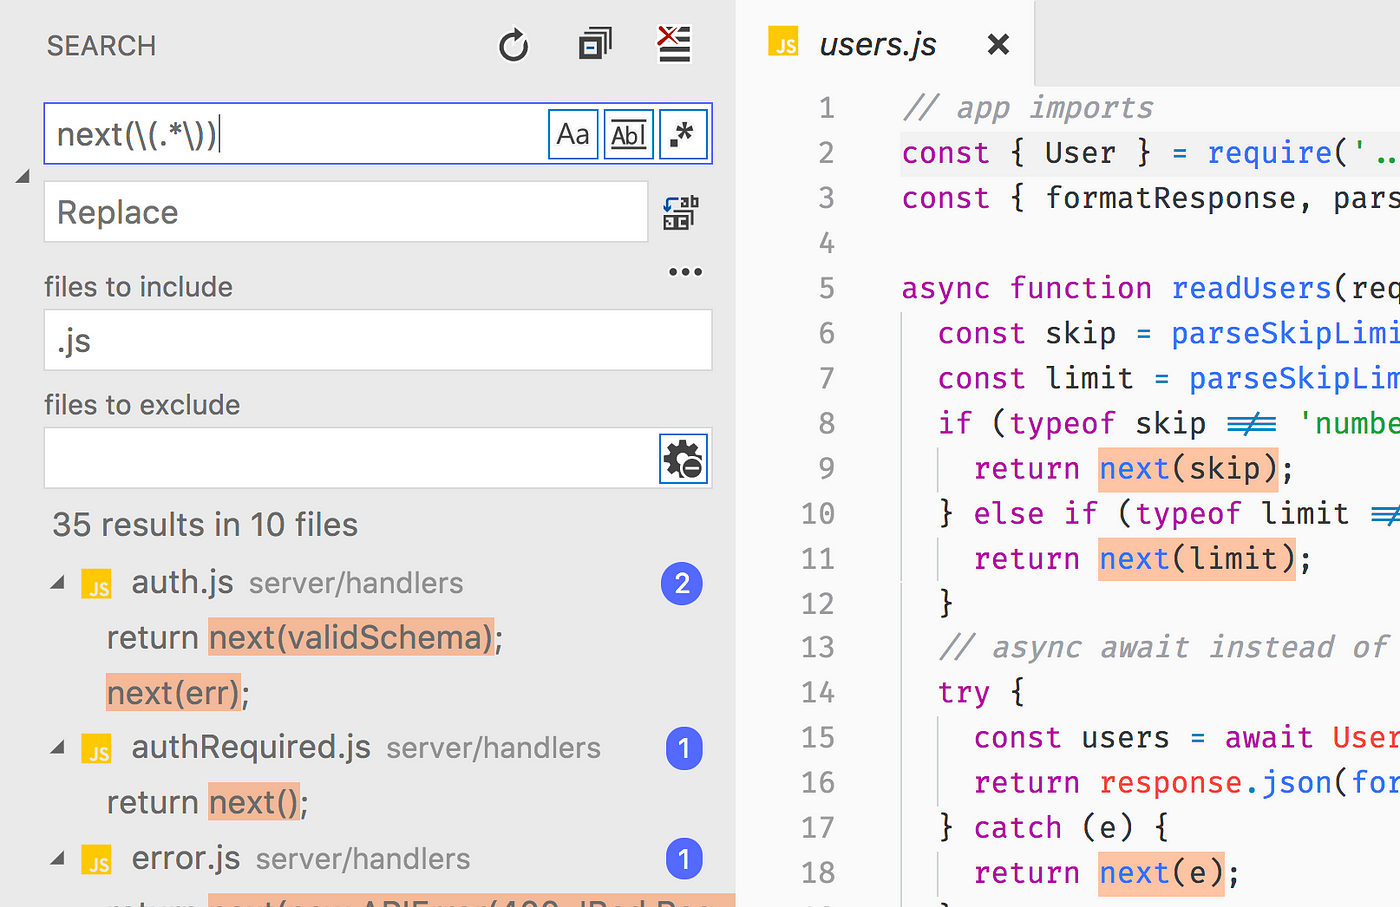
The above screenshot shows a global search of next() with a regex matching anything in between the parentheses.
Global Replace Across all Files
Menu => Edit => Replace in Files
Shortcut: command(⌘) + shift + h
How to Configure User Settings
You will almost always want to customize your editor to fit your own user settings. To get to user settings use the shortcut command(⌘) + ,. Alternatively, if you don't care to learn another shortcut, you can quickly access it via the command palette (command(⌘) + shift + p, then type in user).
User settings will apply to your editor for every workspace (project). They are in JSON format, and you simply copy settings from the default panel (on the left) and append them in the user panel (on the right), thus overriding the defaults with your choices.
As a shortcut, on the default panel (left), if you hover on the left edge where the line numbers would appear, a little pencil ✏️ appears. You can click the pencil ✏️ to automatically copy over the setting into your user settings.

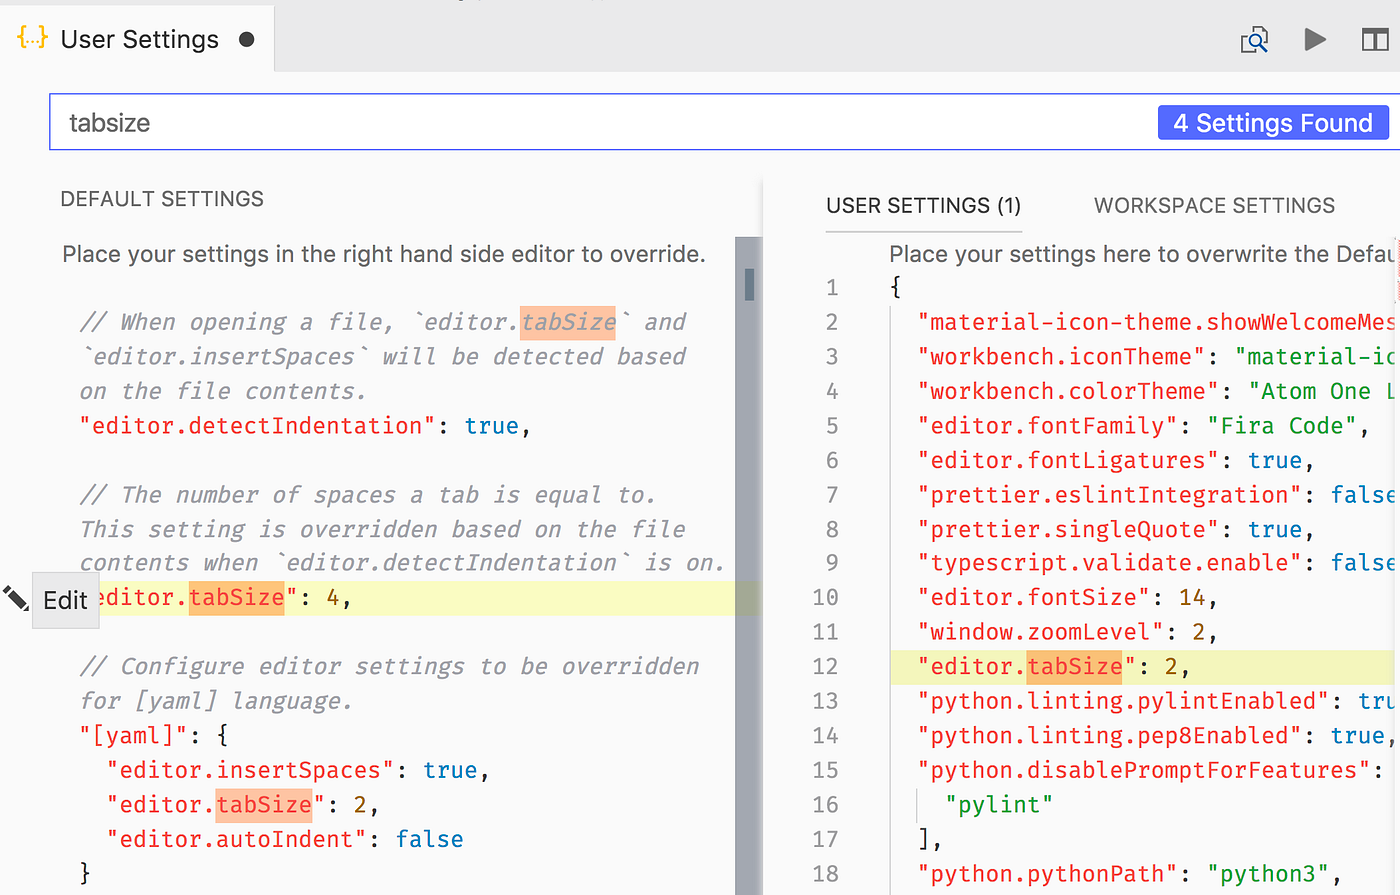
You may also have noticed the second tab called “Workspace Settings”. If you are working on a project with other devs using VS Code, you can apply custom settings to the workspace which will add a .vscode folder to your workspace/project/repository. If you check this folder into git, other team members' VS Code editors will automatically read from this file.
My Top Five Keyboard Shortcuts
- Open the command palette with
command(⌘) + shift + pwhich can get you pretty much anything you want. It is especially useful when you forget other shortcuts. - Select other instances of a selected word with
command(⌘) + d. Tip: You can also presscommand(⌘) + uif you want to undo the last selection (e.g. "oops I highlighted too many"). - Move lines or entire code blocks up and down by placing your cursor or making a selection and holding
option key(⌥)while pressingup arrow(↑)ordown arrow(↓) - Add multiple cursors by holding
command(⌘) + option key(⌥)and either: (a) pressingup arrow(↑)ordown arrow(↓)to add a cursor to the same place on multiple lines or (b) clicking anywhere to add cursors wherever you click. - Open the integrated terminal with
control(^) + backtick(`)
My Top 5 Extensions for Rithm Students
- Prettier code formatter for VS Code. This extension brings prettier (
npm install --global prettier) to VS Code. Combine this with the"editor.formatOnSave": truesetting in your VS Code User settings for best results, in my opinion. - ESLint for VS Code adds ESLint (
npm install --global eslint) support for all JS files. - Open in Browser gives you the ability to right click on
.htmlfiles in the file explorer (left) and open them in your default browser. - Code Runner lets you execute code on the fly via a large “play” button on the top right. Great for solving repl.it problems!
- EditorConfig for VS Code. This extension allows to you reference
.editorconfigfiles, which are a great standardfor collaborating on teams for basic editor setup (e.g. "set .js files to use 2 spaces for tab indentation").
Awesome Features
Peek Editor
In VS Code, you can peek into other files without changing your current view or opening a new tab or window! The peek view is also its own mini-editor, inside which you can edit other files.
You can select a symbol (function, class, variable, object, etc.) in a file and right click (i.e. two finger press or ctrl + click) on it and select “peek definition”.

The default shortcut is option(⌥) + f12, which is a bit clunky for a shortcut, so I would suggest "right clicking".
A similar function is Find All References, which attempts to locate every instance of the selected thing.
Note that your mileage may vary with these advanced features. You may need to configure of your project to have it work for larger projects.
Refactor Into a Function
If you select a few lines of logic statements in your code, you might see a lightbulb 💡 pop up on the left. If you click this lightbulb 💡, it can automatically refactor your code into a new (scope-aware) function! This can be super helpful to keep your code organized.

Type Checking Anywhere
VS Code has native support for TypeScript. In any normal JS file, you can write this special comment at the top of the file to enable built-in TypeScript type check linting: // @ts-check.
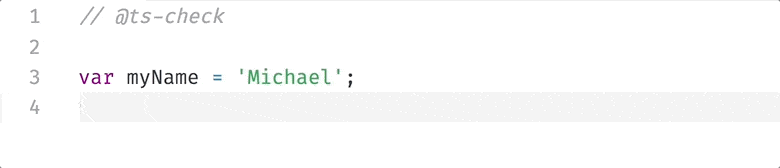

This is free type checking that won’t affect your production code at all!
Fun / Extras
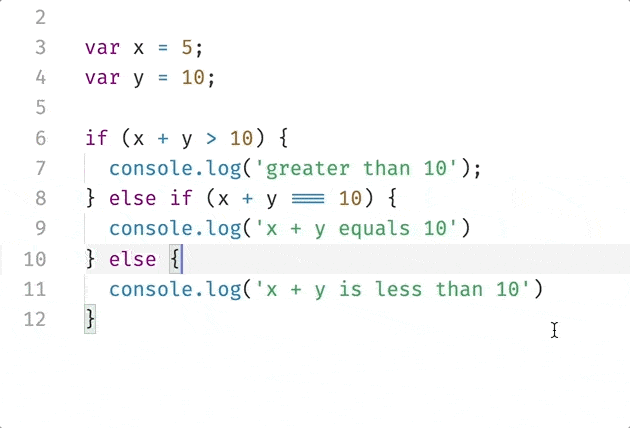
Font with Ligatures
You may have noticed in the above screenshots/gifs that my font has ligatures, meaning that triple equals (===) and other operators look different in my editor. I use a font called Fira Code, and it’s awesome! It has instructions on how to install in VS Code here.

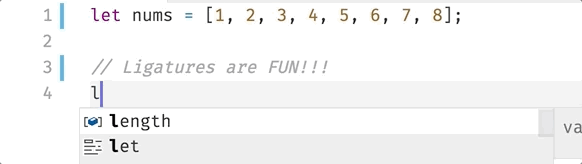
See how the => and === become their own symbols!
Zen Mode
VS Code has a built-in “Zen Mode” which hides most of the UI aside from the code. Use this feature when you want to focus intently on the act of coding itself 🧘. The shortcut is command(⌘) + k followed by z (two separate gestures).
Source: https://medium.com/


Comments
Post a Comment